
Recently played game two of my ongoing play testing of a narrative campaign for Star Wars Legion, designed for the Conscripts.
I used version 1.1 of Crabbok's AI rules [ http://www.crabbok.com/custom-content/legion-ai-system/ ] to run the Imperial side.
Imperials (500/500 points skirmish level)
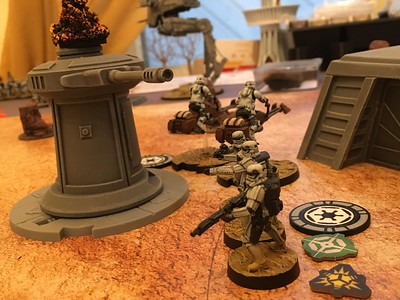
Darth Vader leads the defense of a HoloNet relay station, which is helping to coordinate Imperial anti-partisan operations in this sector of the Outer Rim. He had with him some Stormtroopers and a couple of units of Biker Scouts.
- Darth Vader (190 + 20 = 210) - Force Choke (5), Force Reflexes (10), Saber Throw (5)
- Stormtroopers (44 + 26 = 70) - DLT-19 Stormtrooper (24), Recon Intel (2)
- Stormtroopers (44 + 26 = 70) - DLT-19 Stormtrooper (24), Recon Intel (2)
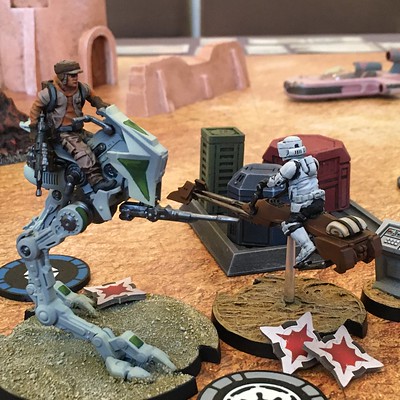
- 74-Z Speeder Bikes (75 + 0 = 75)
- 74-Z Speeder Bikes (75 + 0 = 75)
Rebels (497/500 points skirmish level)
A mixed force of Rebels, led by Luke Skywalker, were trying to disrupt these transmissions.
- Luke Skywalker (160 + 32 = 192) - Force Push (10), Force Reflexes (10), Emergency Stims (12)
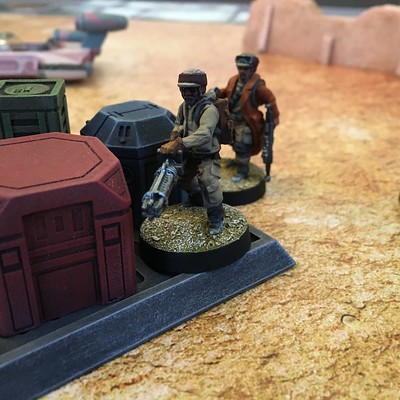
- Rebel Troopers (40 + 22 = 62) - Z-6 Trooper (22)
- Rebel Troopers (40 + 22 = 62) - Z-6 Trooper (22)
- Rebel Pathfinders (68 + 38 = 106) - Pao (22), Duck and Cover (4), HQ Uplink (10), Recon Intel (2), A-300 Short Range Config (0)
- AT-RT (55 + 20 = 75) - AT-RT Laser Cannon (20)
- Commands: Sabotaged Communications (1), Son of Skywalker (1), My Ally Is the Force (2), Push (2), Return of the Jedi (3), Assault (3), Standing Orders (4)
Scenario
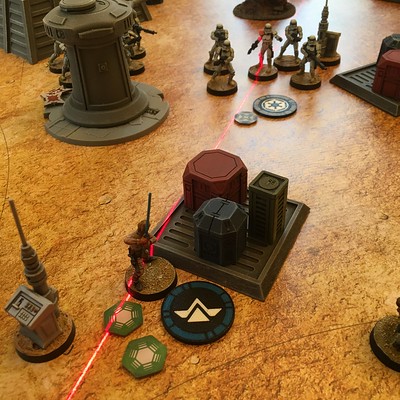
This is basically like the SWL “intercept the transmissions" scenario, with two on-table commo arrays as the objectives. Victory Points are scored if a side has the most unit leaders in proximity to an objective in turns 2 and 4, and at the end of the 5-turn game.
The Imperial forces started the game with several advantages. The commo arrays were shielded (like a Republic-era Droideka), so only Imperial forces in proximity could score until the shields were brought down. The Empire had an armoured gun turret defending the arrays. The command bunker near the arrays could be used for setup (thus protecting the occupants from Rebel fire), if the Imperials chose the appropriate setup area. These advantages were NOT figured into the Imperial forces’ points cost.
The events of the last game affected this one. The destruction of one generator brought down the arrays’ shielding. The damage on the second generator caused damage on the turret, and its weapon would fire at half effect (dice).
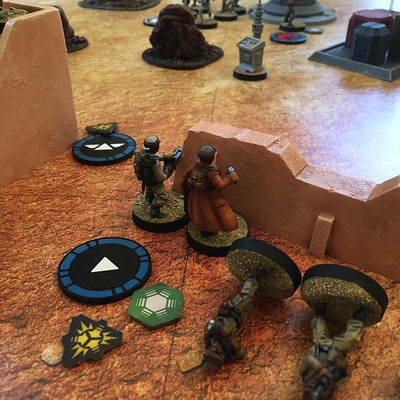
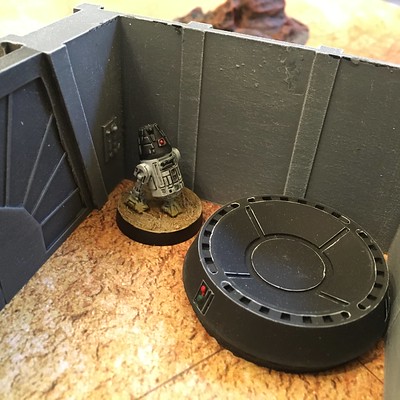
The setup areas would be basically a 12” semi circle centered on the middle of each table edge. In SWL Skirmishes, ANY of the 4 sides are choosable for initial setup. Accordingly, the Imperials chose the side nearest the bunker, with Vader and some Stormtroopers within the bunker (the Imperial droid and the holo emitter also in the bunker were just for local colour, and added no on-table effects). The Rebels setup opposite, with elite Rebel Pathfinders infiltrating into a building just outside their setup zone, to provide long range suppressing fire.


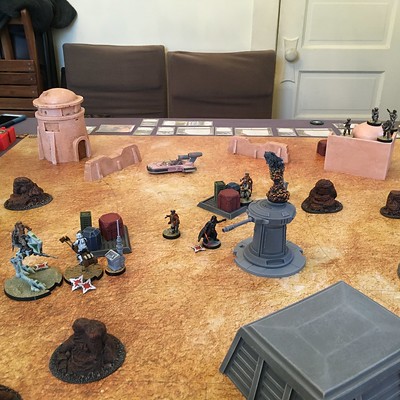
The terrain on this table is a mix of GF9 and Urbanmatz pieces. The desert themed 3'x3' mat was specifically ordered for SWL skirmishes from Mats by Mars.
Game
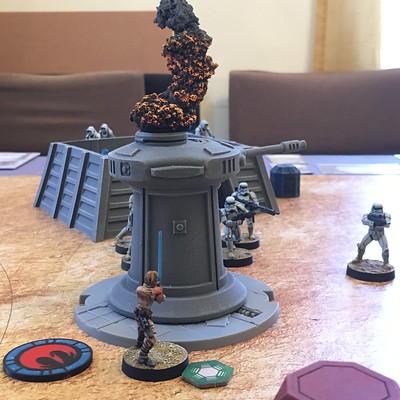
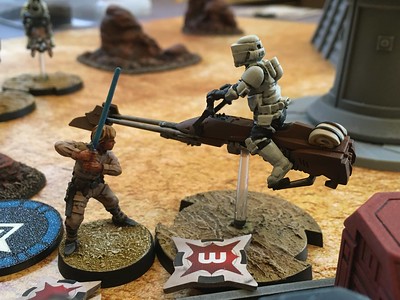
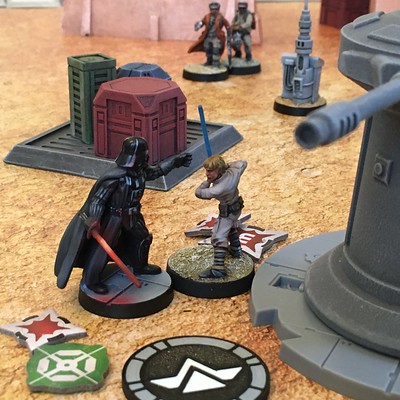
The game started strongly for the Rebels. Some Stormtroopers advanced towards one array, and went into over-watch (“Standby” in SWL parlance). As Luke moved forward they fired at him; he deflected their blaster fire back with his saber, defeating one model for their trouble. Luke then Force jumped forward and cut through the laser turret’s armour with one stroke of his lightsaber, destroying it! Vader then came out and tossed his own lightsaber at Luke, slightly wounding the former farm boy.


The remainder of the first couple of turns both sides jockeyed around, inflicting a couple of casualties here and there and each side scoring a single victory point in the second turn.


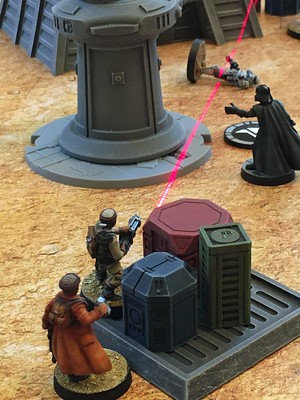
Things got more serious after that, as the Rebels tried to eliminate Imperial units. Luke even set up a neat move where he used his Jedi powers to force one Imperial bike squad to shoot at the remaining single biker of another squad. Biker defense dice suck, except when they don’t; the lone biker was completely unscathed by that close range barrage. Luke had to waste an activation cutting the biker down with his lightsaber.
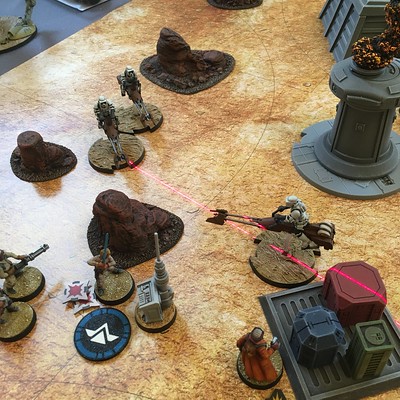
Again, the AI deck diluted sometimes the Imperial tactics. A couple of Rebel units were reduced to only one or two models. The next Imperial to activate could have tried to eliminate one of the reduced squads, but the AI card deck directed their focus onto units with a higher point cost, or within closer range. Luke, being stuck into the middle of the fight, suffered the most from such treatment, and was reduced to only two wounds. He had combat drugs to keep him going for a turn if he suffered potentially fatal damage.

By the end of turn 4, the Imperials were down to only three units on the table. Luke and the AT-RT ran towards the second commo array, spoiling the Imperial chance to score. This gave the Rebels another couple of VPs, but left Luke dangerously exposed in the middle of the table, with no cover.

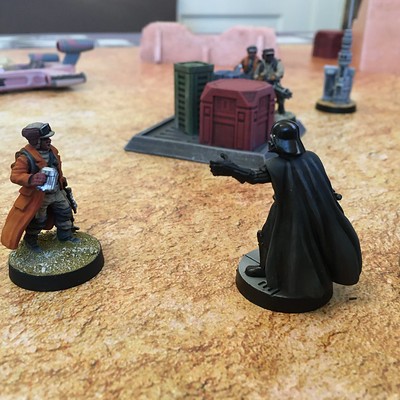
The AI forces responded as you might expect. Luke went down finally in a flurry of lightsaber blows from his own father. However, the rest of the Rebels either hunkered down in place, or concentrated fire on the remaining Imperials, avoiding Vader like the plague. Loaded up with Dodge and Aim counters and Force powers, and having 7 wounds left, he would just Deflect fire back at them or absorb the damage anyway.

This strategy worked. By the end of the game, only Vader and a single Biker with one wound left remained on the Imperial side. They were unable to score, and the final game tally was Rebels 5 VPs, Imperials 1 VP, for an overwhelming Rebel victory.

###
The Imperial incursion into this sector has been severely set back.
Darth Vader, shaken by these reverses and by the knowledge that BOTH his children have allied against him, has started to re-think his role within the Empire.
The Wonder Twins, after months of bacta tank immersion, prosthetic enhancement, physical therapy, and martial arts practice, will be raring to team up together against their dear old dad.
Stay tuned for game three...


