 |
| The Schwarm Tiger out for some preliminary maneuvers on the dining room table |
In the annals of the wargaming hobby, what could possibly be less original than doing up a German
Panzerkampfwagen Tiger Ausf. B, the notorious "King Tiger"? Well, how about a Schwarm Tiger?
Up there with the French Old Guard Grenadiers and the British 95th Rifles of the Napoleonic era, and any 40k faction(s) involving input from Gav Thorpe, the Tiger tanks of the German WW2 panzer lineup are one of the great paradoxes in wargaming. There were not very many of them, and compared to the other weapons in the arsenal, they saw very little action. Yet every wargamer seems to have them, and every rules system that makes an accommodation for them bestows them with a table-dominating prowess that belies the numerous actual problems and challenges that dominated the day-to-day action they did see.
Left to their own devices, I'm sure many hard-core Flames of War gamers would roll with an "army" where the King Tigers are so prevalent they might as well be staff cars, and the non-Tiger support choices are all direct-firing Hummels with a few Jagdtigers thrown in for variety. They would smile and tell you it's all good, because they "paid the points".
I like to laugh at this, but in truth I am a hypocrite. I am as stuck into it as any gamer. I may not do the "all King Tiger army", but I still like to roll with the heavy kit. Big guns are fun. I've got a Death Wing force for 40k (although ironically this not actually powerful on the table, but anyway). I have
super heavy tanks for my Imperial Guardsmen in 40k. We've
played spearhead scenarios pitting the big cats against the Soviet hordes - and in one funny instance,
they didn't even need to engage. We've also used the King Tiger in the odd 28mm WW2 game, either as an objective or as a participant (last stand in Berlin - that was a fun game, although I recall Brian H knocking the King Tiger out with a bit of an iffy shot that left me doing a bit of a sulk).
These are fun games, and as long as the scenario is sensible, you avoid an actual 40K-i-fication of a historical encounter. Pushing tanks around is fun - and using the toughest tanks with the biggest guns out there is
lots of fun. Knocking them out of action is even more fun (well, for the other players)!
And so the Gün Schwarm. The Güns already have
Panthers, and a pimped-out
Hetzer. In this context, the Schwarm Tiger will fit right in. Besides, we face the deadly
T-640. Time to embrace the enjoyment of the big tanks and big guns, and get one for the Güns.
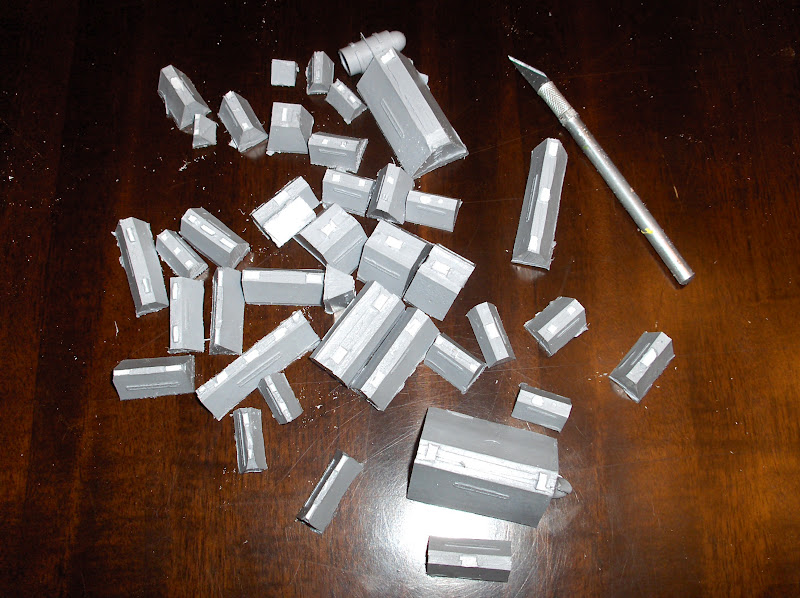
Hobbymaster had put out a 1/48 Scale King Tiger, so last year I acquired one on EBay and took the old hatchet, some tank sprue bits and tried to see what I could come up with.... then I moved, etc. etc. blah blah delay etc. I finally found the thing last week, and thought "what the heck, let's see what I can come up with..."
 |
| "Before" - a Hobbymaster 1:48 scale King Tiger tank |
First off, just a quick acknowledgement that the Hobbymaster model is quite beautiful. It felt like sacrilege to hack it. But once I had cut the barrel off, I was kind of committed....
I mounted the requisite absurd smooth bore cannon and a co-axial laser. I hacked off the cupola, and replaced it with a cupola from a Space Marine Predator/Rhino kit. I wanted the model to have a bit of eminence, so that called for a tank commander in the hatch. I opted for a Death Korps tank commander and heavy stubber combo from Forge World. I popped a couple of technical-plate looking things from assorted GW kits on the odd open spot - and there were not too many because the model already has a beautiful bunch of stowage, cables etc. A heavy bolter went to replace the MG on the hull.
 |
| The GW tank search light is mandatory on all SpaceKrieg vehicles, no matter the faction |
And of course, we needed the standard issue Future War searchlight.
 |
| Gün Grenadiers on propaganda maneuvers with the Schwarm Tiger |
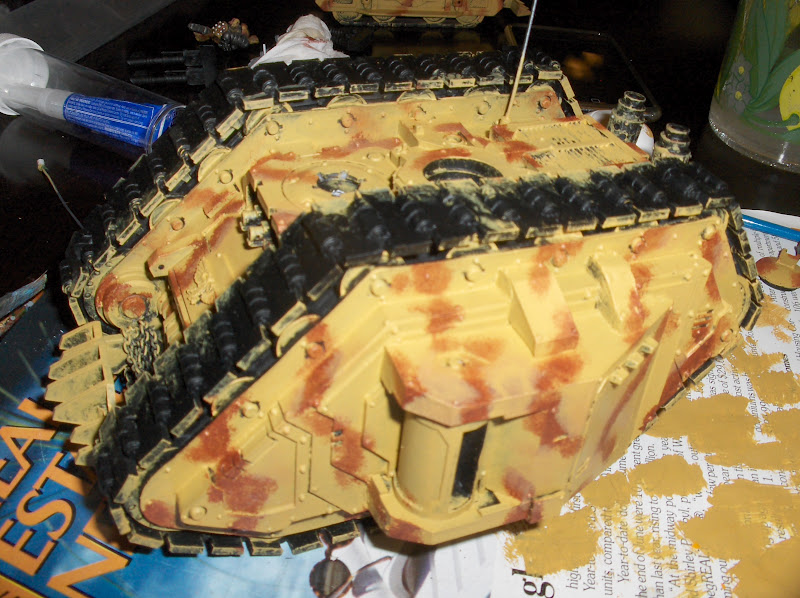
So far my Gün Schwarm vehicles have all been a single colour - a dark mustard-looking yellow. A heavy hitter like this tank should stand out, so I bucked up and decided this would be the model where I would try a bunch of different stuff - the Battlefront spray paint, the airbrush, pigment powders. What the heck?
 |
| Rust splotches courtesy of Forge World pigment powders |
I primed the whole thing black, then sprayed a coat of "German Armour (Mid/Late)" paint from Battlefront. This was actually a big change for me - I only spray black, and then paint everything else, as it seems to be the only way my painting approach can cope. But several people have recommended these sprays, and they were right. I can see how people can crank out FOW tanks by the platoon using them. I'm glad I tried them, and look forward to using them on other models.
 |
| I imagine that the environment on FuturKom worlds would be hard on paint coats |
Up next was the air brush. Oh man, what an adventure that was. I wanted to replicate some variant of the infamous German "ambush" camouflage pattern - aka the pattern that was already pre-painted on to the model (don't get me started - I like to paint things, or try to, myself - it's a hangup). I have always been wary/afraid of airbrushes, and envious of those who are not. I like to paint camouflage on to troops and vehicles, even "sprayed" patterns, and will try every trick I can think of just to avoid the airbrush.
Why don't I like airbrushes? To me, adding a mechanical element with all sorts of variables to painting just seems like a big pain in the *ss, and minimal value for the effort. But now was the time to be bold! So off I went...
 |
| The Hobbymaster vehicle had great stowage already on the model |
Let's just say it was a very messy process. I hate a lot about airbrushing. The airbrush is so needy. The paints have to be thinned - or at least some of them do. The containers involved all seem to be designed to preclude the notion that you would ever be pouring the paint or the thinner into yet another container, so it's a frigging mess.
The results were uneven, to put it mildly. The brown and the green worked out OK, but I found that I had covered too much of the yellow. So I tried some Tamiya yellow-green, and I think it had too much thinner, so it went on kinda funny. And the whole time I was not really protecting my tank commander from the paint, so he was acquiring many layers of paint for no reason. My summary of using an airbrush -
@#$@#$@#$@#$!!!!
 |
| I tried to put a lot of rust coloured pigment powder on the vents and exhaust |
Thank the powers-that-be for GW's Devlan Mud wash! A wash of that stuff served to bring a useful tint back to the yellow. I followed up by using a sponge to dab spots of GW Desert Yellow over the airbrushed Tamiya yellow-green. I concentrated on some areas where the border between the yellow and the other colours had turned out really runny-looking. I then dry-brushed the whole thing with the same GW Desert Yellow, and found the pattern had become serviceable, if dark. But that is one of the advantages of an imaginary sci-fi setting - any camouflage you apply will be appropriate for some place. It's a terrible rendering of German WW2 ambush camouflage, but fine for Gün Schwarm.
 |
| The Templar decal serves as an air identification marker for the tank, to try and keep the SchwarmWaffe from strafing its own side on the battlefield... |
I used an Americana black paint to cover the stowage, tank commander, treads etc and go down to some more standard painting for these elements. Finishing the tank commander was tricky, as he had many extra layers of paint already on him from the priming and various airbrush coats, but here didn't turn out too bad. I painted the tops of the open tank hatches with GW Kommando Khaki to mirror a different internal paint colour for the vehicle. A layer of gloss was next to prepare for the decals, which were a mix of tactical numbers from the excellent "
Company B", and Black Templar decal from a GW Space Marine sheet. The model then received a hit of dullcote.
 |
| The suitably absurd-sized main gun; advanced tech on the turret prevents decapitation of the gunners due to recoil on the gun mount... |
Weathering was up next. I tried to get all clever and mix some rust coloured weathering powder with an acrylic medium. I hoped to get the pigment to wash into crevices etc. This didn't work - as opposed to some kind of wicked IPMS-style rust effect, I ended up with a dab of brown-looking acrylic paint. Oh well. Plan B - a dry application of the pigment powder, and this worked much better. I went really hard on the spare track sections hanging on the turret - I wanted those to have rusty finish, to show the vehicle has seen hard service on some FuturKom industrial planet. I used some black pigment powder on some of the exhaust areas and the muzzle of the main gun. I also painted some chipped areas using GW Dark Flesh and GW Boltgun Metal.
 |
| Propaganda maneuvers with Panzer 2050 Ausf. F |
And so we have a Schwarm Tiger, ready to join the fight against Kommulism. I imagine this will operate much like its WW2 inspiration - dispatched to the front in a battalion-sized unit that was worn out by the FuturKom hordes to platoon-sized detachments in no time. The tank is slow and prone to breakdowns. The Gün techs struggle to perform the maintenance needed on the vehicle's complicated systems, including its insane 135mm smooth bore high-velocity cannon, even as the commanders clamour to keep the thing in the front line. I'm looking forward to putting this thing on the table, and watching it get knocked out on the first turn...
As for the airbrush, at least I've tried it. Like anything, I'm sure it will get a bit better with practice. But I remain envious of those folks that know how to make them work
properly.


