My second game was against BenI and his Slaanesh Chaos Daemons:

(IIRC)
- Daemon Princess, with Pavane of Slaanesh
- Herald, with Pavane of Slaanesh
- Fiend
- Fiend
- Daemonettes of Slaanesh
- Daemonettes of Slaanesh
- Slaanesh cavalry
Pavane is a very interesting daemonic power. With an 18" range, the caster can move an enemy unit (including walkers) D6 inches.
Objective: You must secure as many Supply Crates as possible and hold them at the end of the game.
This was an interesting scenario. The PDF convoy consisted of three Chimera armoured fighting vehicles (each of which contained one Supply Crate), escorted by a pair of Sentinel walkers. The convoy moved and fought on its own, according to various special rules. The only way to get at the Supply Crates was to Wreck or Immobilize the Chimeras, but the Crates were very fragile and would be destroyed on a Destroyed/Explodes! result or possibly upon a penetrating hit. The Crates could be picked up, and placed in another vehicle.
The convoy was set up in single file along the centre line of the table, starting at the eastern short table edge, facing west.
I won the initial die roll and chose to go second. In this way, the convoy's Sentinels would move to engage the Slaanesh forces, and maybe the daemons would be kicked around for a couple of turns. My plan was to try and seize the easternmost Supply Crate, and then play keep away, and maybe even destroy the other Crates. To win, the Eldar would only require control of one more crate than their mortal enemies!
A couple of challenges arise for Codex: Chaos Daemons players. One, you have to hope you get the correct part of your army and, two, you have to hope that enough of your force comes in fast enough.
Ben divided his army, and rolled for which part would appear on the first turn. Unfortunately, his Daemon Princess was in the initial attack wave. Not what he wanted.
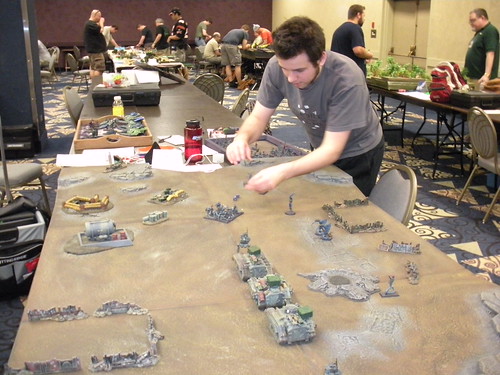
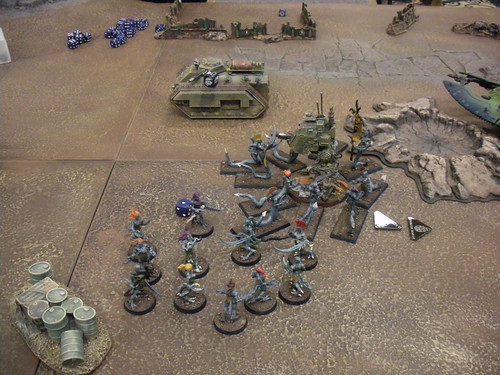
In the photo below, looking west, Ben can be seen placing his cavalry unit. To the east, Ben's left, can be seen the Princess, the Fiends, and the Herald just to the northeast of the large crater.
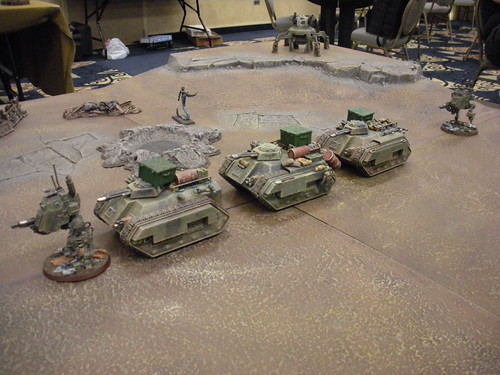
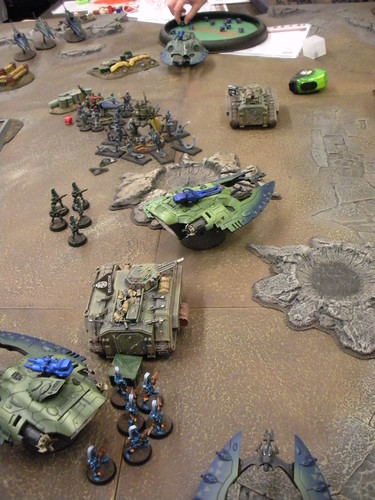
Below, the convoy can be seen heading west.
The next turn was eventful. The convoy fired on the Slaanesh forces, wounding the Princess and the Herald. The Chaos cavalry attacked the lead Sentinel, hoping to put it out of the fight quickly.
The Eldar forces received from reserves the two mounted Fire Dragon squads and the Autarch, which moved together onto the western table half, skimming (respectively) Flat Out and Turboboosting, to garner cover saves from the convoy's shooting. In the southeast, the Night Spinner moved on to pot shot the Fiends, the two Avenger Serpents moved on poised to strike at the convoy, and the Warp Spiders used Deep Strike to teleport behind the easternmost Chimera, knocking it out and revealing a Supply Crate.
The Sentinel at the head of the convoy somehow survived, staying locked in combat. A pack of Daemonettes appeared to the northwest. The Princess and Daemonettes moved towards the lead Chimera. The Fiends tried to take out the lead Eldar Wave Serpent, but failed. In an interesting move, the Herald used Pavane and sent the rearmost Sentinel walker back towards the Spiders, who were subsequently locked in close combat with the Walker, which they couldn't hurt in close combat.
The convoy managed to shoot down the Princess, who failed her saves. The Daemonettes attacked the Autarch, wrong-footing her so she couldn't use her lance. The Fiends piled into the attack on the Sentinel, which still managed to survive.
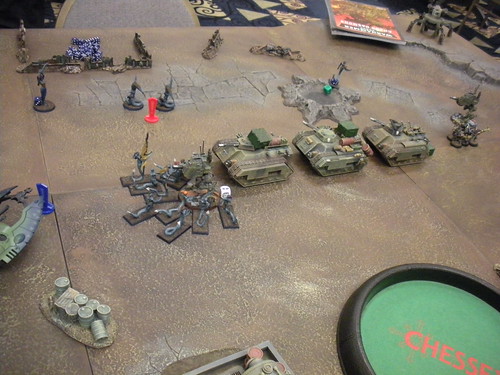
The two Dragon skimmers split up after one unit dismounted to blow up the middle Chimera and its cargo, and the other moved to block the convoy. The Vyper squadron appeared to the southwest, immobilizing the lead Chimera with laser fire. At the bottom of the picture, a Dire Avenger squad can be seen dismounted, having seized a Supply Crate.
The lead Sentinel carried on its hopeless fight, damaged by the Slaanesh surrounding it. The Autarch went down under the talons of the Daemonettes. Another squad of Daemonettes appeared via Deep Strike in the northeast, running onto the cover provided by the rear Chimera's wreck.
The lead Sentinel finally went down, so the Fiends and the cavalry moved east, into the crater left by the exploded Chimera. The far Daemonettes, looking for another foe after their victory over the Autarch, ran east.
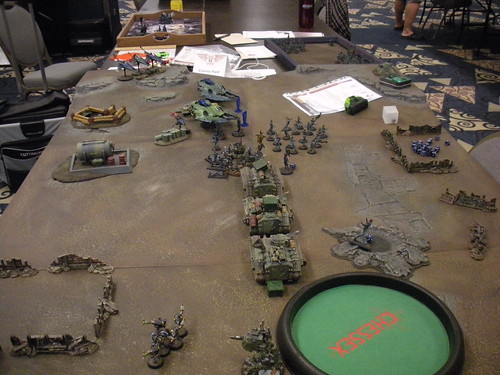
The Avengers with the Supply Crate mounted up and moved southeast behind a wall made of Eldar skimmer tanks. The other Dire Avengers had dismounted as a speed bump for the near Daemonettes, who were greatly reduced by concentrated firepower. The Farseer finally arrived, and attacked the surviving Sentinel, but failed to hit it. To the northwest, Shuriken Cannon fire destroyed the lead Chimera and the third Supply Crate. The game now turned on possesion of the last Crate, held by the Eldar.

As the game wound down, a couple of Daemonettes made it into contact with the dismounted Avengers. The other Daemonettes managed to contact the Farseer, hoping for a moral victory. However, there was scant likelihood that the Slaanesh would be able to break through the mobile skimmer wall to get at the still-active Wave Serpent containing the sole remaining Supply Crate.

Result: Eldar Win
Slaanesh versus Eldar is a classic match up. The battle fortunately went well for the Eldar, whose fast skimmers were able to maintain the initiative against the Chaos forces. The game MVP award goes to the lead Sentinel, who survived much longer than it should have.
Please click here for Game Three - Hill 0.25.
No comments:
Post a Comment