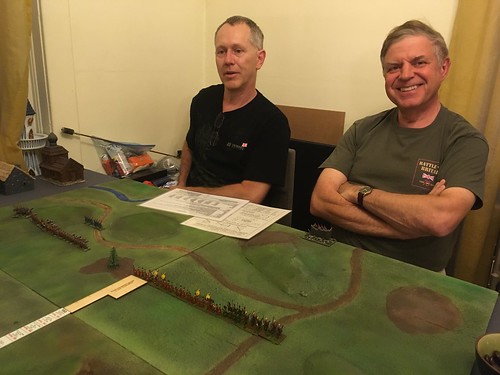
Last Thursday I ran a new (to me) game, What a Tanker!, from Too Fat Lardies. Conscripts Dallas and Kevin had also expressed their interest in the game.
Game: The Battle of Kursk: a microcosm in 28mm of one of the biggest clashes of Soviet and German amour. One tank per person; the game is all about the friction of trying to command and crew a tank in combat.
I had tanks available for use, but if players were very keen, they could BYOT (Bring Your Own Tank). The stipulations were that it must be:
- of suitable size for 28mm figures (i.e. 1/48, 1/50, or 1/56 scale - note that all the tanks in the photos are 1/48 and 1/50);
- painted; and
- available for service on the Eastern Front, Kursk salient, in July, 1943. So, e.g., no Jagpanthers or JS-II's.
In the end, only Kevin brought a tank to the fight (see below).
I will walk the reader through the activation of a single tank during a turn of a hypothetical game set in the fall of 1941.
Below, a T-34 (Model 1941), wonderfully painted and weathered by Kevin, which now resides in my collection. (Click on the picture to embiggen.)

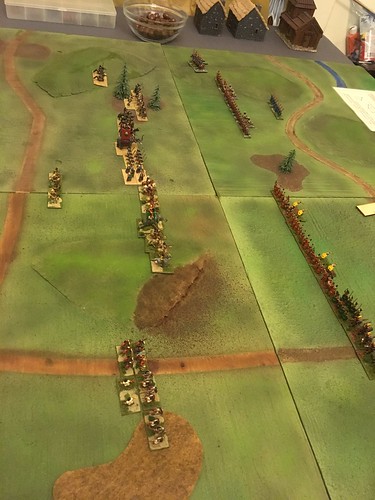
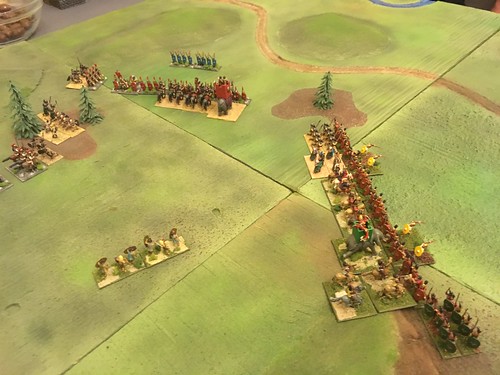
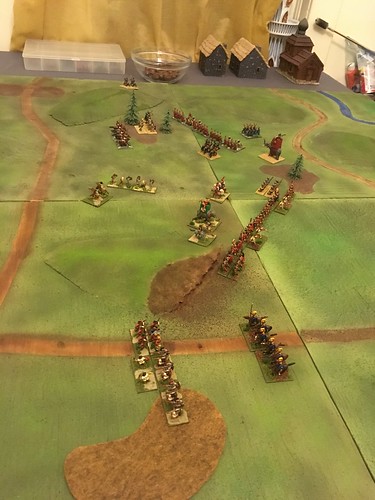
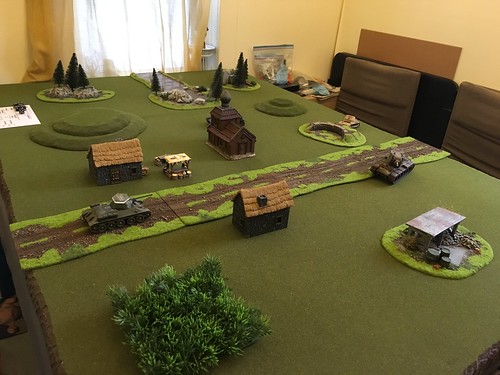
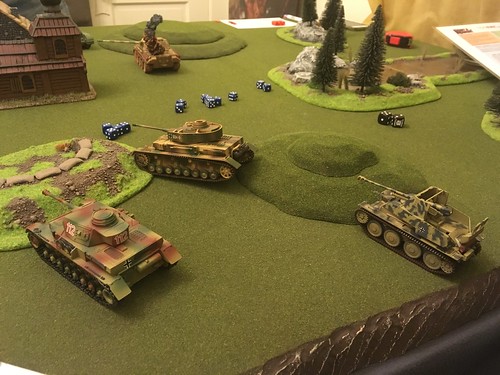
Below is the lay of the land (which would be fought over a couple of years later by the Conscripts). For tanks, from L-R, there's the T-34, a Panzer IV D lurking behind the church, a Panzerjager I tank destroyer behind the revetment, and a knocked out KV-2.
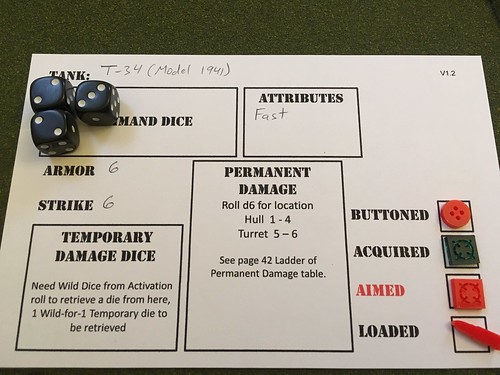
Assuming that this is like the second or third turn, below is the player's Dashboard for the T-34. The Armor and Strike of 6 is very good for this period of the war; the tank commander has buttoned up, as indicated by the marker on the sheet, and thus can only see to the front 60 degree arc of the turret. The main gun is loaded.

Each activation, the player rolls 6 Command Dice for their tank, representing the tank commander and crew trying to perform all their actions. Each pip on the die has a different resulting action:
1 = Drive; each Drive Die allows you to:
- Move Forward 2D6 inches.
- Reverse 1D6 inches.
- Turn on the spot up to 90 degrees – using one of your 2D6 from 1 above.
- Turn on the spot 91 degrees to 180 degrees. Requires full Drive D6
- Rotate Turret up to 60 degrees if stationary
- Cross a Minor Obstacle.
- Must have LOS to target, 60 degrees forward arc from turret (or front of tank if no turret) if ‘Buttoned’, 180 degrees if Unbuttoned. Acquisition lost if no LOS, or outside arc.
- Target in Open, is acquired Automatically by an Unbuttoned Tank.
- Target in Open, is acquired using 1 Acquisition Die by a Buttoned Tank.
- For each Minor Obstacle intervening, 1 additional Acquisition Die will be needed.
- For each Major Obstacle intervening, 2 additional Acquisition Dice will be needed.
- Target is Low Profile, +1 additional Acquisition Die.
- Partially (~ 1/3 of vehicle) obscured = Minor obstacle.
- Largely (~2/3 + of vehicle) obscured = Major obstacle.
3 = Aim; Aiming can only take place when the target has been Acquired.
- Arc of Aim: Target must be within 60 degree arc of turret (or front of tank without a turret). If not within arc, turret/tank must pivot before aiming.
- One Aim Die is needed to Aim.
- Any number of additional Aim dice may be used to -1 to firers required score to hit a target.
- Aim is lost if either tank moves.
- Unloaded tanks may aim but must load before they can fire.
In order to shoot, the tank MUST :
- Have Acquired a Target, and
- Be Aimed, and
- Be Loaded.
Damage occurs when there are more hits than Armor Saves. Various calculations are performed if firing form the Flank or Rear, and if the number of initial Shoot dice have more Critical Hits than Ordinary Hits. Damage is represented either by Temporary losses of Command Dice, or Permanent losses of Command Dice, coupled with physical effects (e.g. -1 roll To Hit for first Turret Permanent Damage).
The loss of Command Dice represent the degraded capabilities of both the crew and the tank.
5 = Reload; use 1 Reload Die to reload. Tanks start the game Loaded.
Tanks with Rapid Fire Guns do not need to reload between each shot in a single activation, they can reload at the end of the current activation or before firing in a subsequent activation.
6 = Wild; each Wild Die may be:
- Changed to any other Command Die.
- Banked to give +1 to Initiative Die Rolls next turn, per D6 banked in this way.
- Add -1 to “To Hit” score required per D6.
- Add 1 Additional Strike Die in step 2 of firing process.
- Recover a Command Die lost to Temporary Damage. Can be rolled in future activation.
Some specific tank special abilities modify the Command Dice rules. For example, Fast tanks like the T-34 may turn any ONE die into a Drive Die.
Here, the player has rolled "2, 2, 3, 4, 4, and 5" for their Command Dice.
The player has a number of options. The actions can be carried out in ANY order. So, one option might be to Acquire a target, Aim at it, Shoot, Reload, and Shoot again!

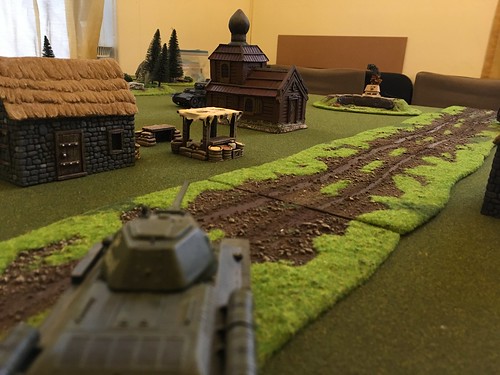
Using a template made by the game designers, the T-34 is Buttoned and thus the crew can only see and shoot to its front 60 degrees. So, the Panzer IV is out of arc.

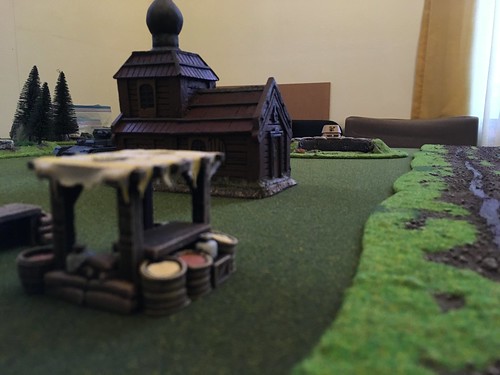
Below is a tank's eye view of the field.
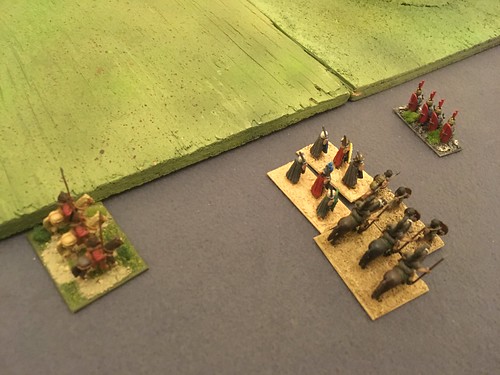
Below, the Panzerjager I taking cover behind an abandoned Russian position.

The T-34 is Buttoned, and the Panzerjager is Partially obscured, so two Acquisition dice are required to Acquire the target. The T-34 has an Aim, so it can fire.
Because of the range and obscurement, the T-34 needs a 7+ To Hit (looking at a table in the rules). The player decides to use one Shoot die to fire, and to use the other Shoot die to make his chance to hit 6+ again. The player rolls a "6" and so hits! Rolling their Strike dice, they get two "5's" and a "6" for hits; 2 Ordinary and 1 Critical Hit. The Panzerjager player rolls the measly 2 Armor dice they have, and fail to stop any Hits.
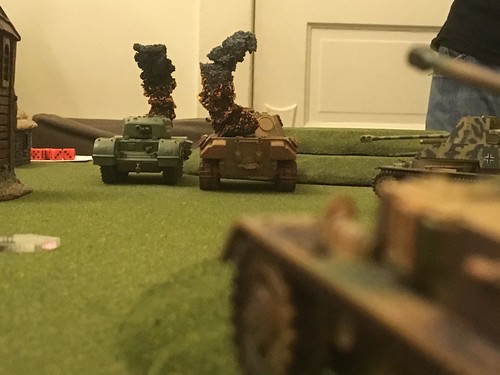
Hits exceed Saves by 3 or more: Target Tank destroyed:
- More Crits than Ordinary = Tank Brews up, killing crew.
- Otherwise, crew bail out.
The Panzerjager crew bails out, retaining any special skills they may have earned over time.
The T-34, not having any target any more (the Panzerjager is destroyed; the Panzer IV is out of arc and is neither Acquired nor Aimed at), must make a decision about what to do next. If he reloads, he is potentially setting himself up for a side shot from the Panzer IV. As a Fast tank, the T-34 player therefore decides to change the Reload die to a Drive die, and turn the tank to face towards the enemy tank they can hear moving behind the church.
Buttoning or Unbuttoning (i.e., sticking your head out the hatch) happens at the end of an activation. The player decides to stay buttoned up. Though granting better vision, being Unbuttoned grants enemies an extra Strike die if they successfully hit; being a tank commander is a dangerous job!
Below, the final position of the T-34.
Below, the current status of the tank. The tank's gun is also now unloaded, but at least its front armor is pointed at the enemy!

Game Play
The Thursday game was loosely set in the July, 1943 time period, during one of the numerous tank battles that occurred in and around the Kursk salient. I chose this time period because that were a wide variety of tanks fielded; relics dating from the earliest days of Barbarossa, to the latest in mid-1943 technology (Tigers and Panthers and Ferdinands, oh my!). Randomly choosing sides, the forces set up as follows:
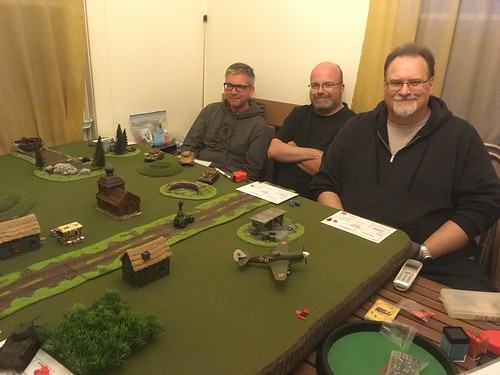
Below, from left to right sitting behind the South table edge, the German side consisted of Dallas (fielding a 1/50 scale Panther Ausf. D, a diecast from Corgi), DerekY (1/48 scale Panzer IV Ausf. F2, an already painted and finished model from New Millennium), and Kevin (Panzer IV Ausf. F2, a 1/50 scale Solido diecast model that Kevin himself had re-painted in a very nice camo scheme).
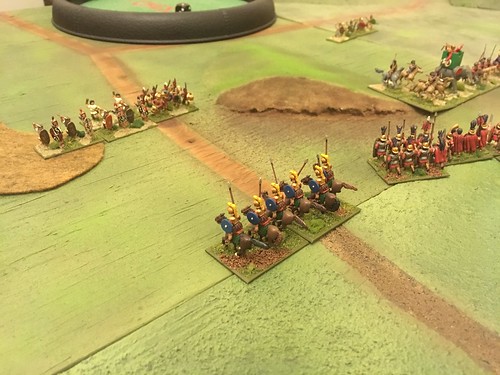
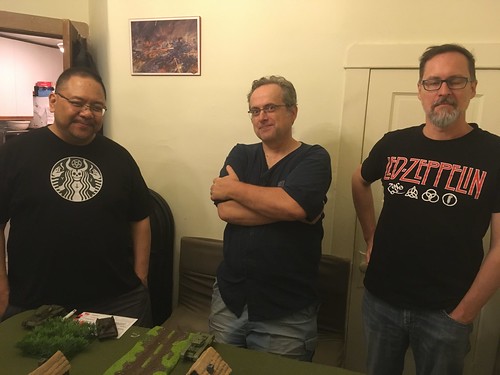
Below, from left to right, looking North, the Russian side consisted of, from left to right, myself (1/48 Hobby Boss(?) KV-1E heavy tank; plastic model kit assembled, painted, and weathered by the craftsmen at FloZ Model Workshop), ChrisH (1/50 scale T-34 Model 1943, a Corgi diecast), and JohnC (1/50 scale lend-lease Churchill Mk. IV, another Corgi diecast).
Each player started the game with a single card from the Tanker deck, representing skills amassed over previous battles' experience. Such cards are basically one-use advantages on the tabletop. Usually, you only earn such a card after knocking out an enemy tank, but for this one-off scenario, we assumed that veteran tank crews were facing off.
In the What a Tanker! rules, players dice off for the order in which they activate each turn. For the evening's game, to speed play I used playing cards numbered 1-6 dealt out face down at the start of each turn.
The game started with a general advance, with most tanks heading towards the enemy. The 2 Panzer IV's took up positions hull down by a hill; near the South table edge.
Below, in the foreground is the heavily armored KV-1E plowing through some poor farmer's crops. Dallas' Panther can be seen advancing past the Orthodox church, behind the peasant market stall.

Below, after Dallas laid some accurate shots into the Churchill (which pinged off its Heavy armor) and the T-34 (causing damage, which forced Chris to temporarily lose some Command Dice), John's Churchill one-shotted the Panther with only a 6-pounder gun! Clearly, as Dallas observed, anything can kill anything in this game. Using the optional King of the Ring rule, Dallas would re-spawn on the South table edge next turn, fielding a Marder III. This game is not a simulation; more like World of Tanks with physical models.

Derek's Panzer IV quickly changed targets to the advancing Churchill. (Photo credit: DerekY @pathoftheseer)

After taking even more damage, Chris' T-34 finally succumbed to a 75mm round from Kevin's tank. Chris re-spawned with a T-34 Model 1941, the one painted and weathered by Kevin. Meanwhile, my KV-1E could barely muster enough Drive dice to get out of the crops...

Below, Dallas' Marder enters the fray. With its captured Russian 76.2mm gun, this vehicle was a real glass hammer. Great gun, but paper thin armor for 1943. The Churchill fired at Derek's tank, but Derek rolled hot (as he did all game), and shrugged off the hit with a great Armor roll. John then played his Tanker Card, which was Hot Tracer.
"Use a machine-gun to fire tracer at a target that you have already acquired. Play this card on your activation. For the rest of this turn the tracer fire will count as two TARGET ACQUISITION dice for any friendly tank attempting to acquire the same target as you."
Chris and I lit up Derek's panzer. Sadly, neither of the other Soviet tanks could penetrate Derek's Unobtanium armor plating.
As Dallas scooted North, Derek reversed his Panzer IV tank to a hull-down position behind the small hill, and proceeded to knock out John's Churchill with a single round!
John had to take off, but he did express that he was having fun with this new game.
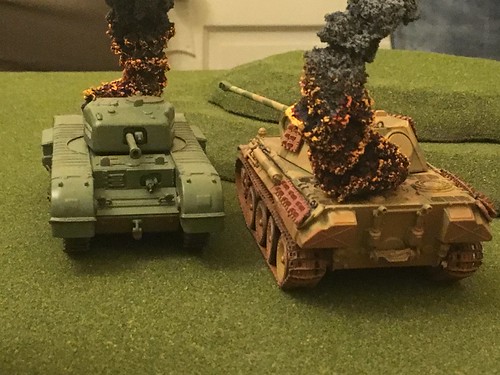
Chris' fast T-34 sped around the church and laid fire into the panzers. Kevin took careful aim (literally, with multiple Aim dice) and knocked out the T-34 with a single shot! (Photo credit: Derek Y @pathoftheseer)

Meanwhile, Dallas' Marder had gained the high ground, and sighted in on the rear deck of the KV-1E. Luckily, its Heavy armor held up.

With the Russians outnumbered three-to-one, we decided to call the game at the end of the current turn. My KV-1E finally found some good Drive dice, and surged forward 17" on the tabletop.
If the game had continued, depending on Command dice, I would have tried a ram on one of the Panzer IV's. Armor 10 vs. Armor 5 gave me good odds to completely crush the other tank beneath the KV's wide tracks, but that's all hypothetical now.
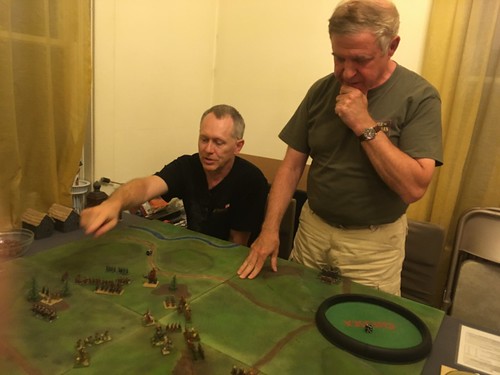
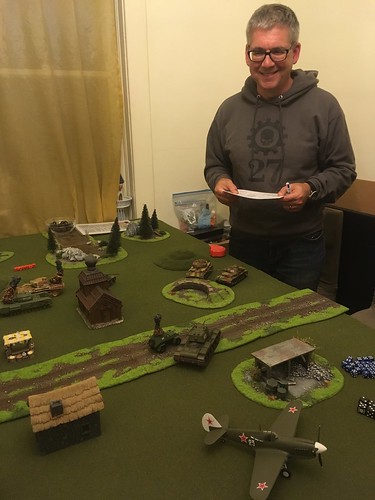
Below, Dallas looks over the table at game's end, with the smoke of victory (or defeat, depending upon one's POV) wafting over the field.
Future games
People seemed to have a good time, and I look forward to playing this game again soon.
I am in the midst of collecting tanks for the period from the beginning of Operation Barbarossa in 1941 to the Battle of Kursk. So, in addition to the German tanks used in the game I have various early Pz. 38(t)'s, another Panzerjager I (with 4.7 cm. AT gun), more Pz. IV D's, more Panthers, and a Tiger. For the Soviets, more KV's and T-34's. There's also a T-26 (Model 1938) and a BT-5 on their way from Eastern Europe. Below, a KV-2 heavy assault tank that arrived by mail the day of the game, superbly painted and weathered by Polish modeler Andrzej Kielar (@artminimax).

I also have a long-OOP T-34 (1941) from Bandai that Founding Conscript Curt gave me awhile ago. I am thinking of painting it up myself, and including at least some of the interior details provided in the kit (maybe the turret's gun breach and ready ammo racks, with an open hatch).
I am looking to do some more early- to mid-war games. Currently, I am thinking about re-fighting part of a June 1941 incident near Raseiniai, Lithuania, where a lone KV-2 tank managed to hold off the advance of the 6th Panzer Division for a full day whilst being pummeled by a variety of tank and antitank weapons, until finally running out of ammunition and being knocked out.
That would also make an interesting scenario for Bolt Action, Chain of Command, or some other set of WWII skirmish rules.