Wednesday, November 19, 2014

Sedition Wars Project - Mini-Update

I did not get into the Kickstarter when Sedition Wars was first offered. So, some of the Kickstarter-only rewards have been hard to find. I was able to buy on eBay a few "Opticamo" Vanguard Samaritans and heroes - think thermo-optic camouflage from Ghost in the Shell.

These are clear resin models, to represent when a figure has been thusly cloaked. In game terms, this costs a Tactic from the Tactics Pool every turn to place the model in Opticamo Mode, but allows the model to activate without triggering enemy Reflex actions, treats the model as if in cover for enemy abilities that rely on visibility, and grants the model a negative modifier to be attacked!

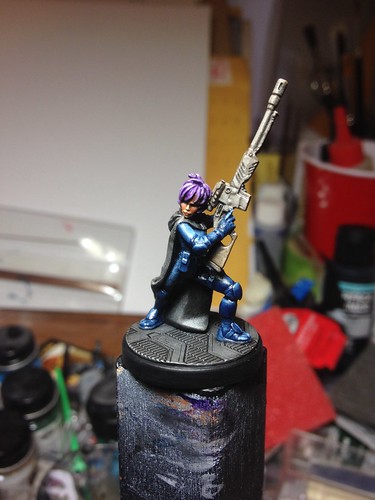
I just finished an Opticamo version of Operator Akosha Nama. It was slightly easier to clean up than the original restic model. I used both super glue and 5-minute epoxy for assembly. Its stock frosty surface looks better, in my opinion, than the clear gloss finish that I have seen used for other clear resin figs.

Camera Roll-1163

I airbrushed zenithal highlights on the lower portion of the figure, using Vallejo Black and White surface primers.  I then laid in thin  glazes of GW Asurmen Blue for her boots and jumpsuit, and glazed both her smock and base with Badab Black. The paintjob also hides the pin I used affixing the figure to its base. The resulting effect simulates Akosha activating her camouflage.

For comparison, here is a photo of the original figure I painted some months ago.

Camera Roll-552

I wanted something other than just a ghostly figure on the table, and I think the effect works out OK.

There's at least one fan-made Sedition Wars scenario out there pitting a lone Opticamo Akosha against a horde of enemies...

Edited to Add: A solo Akosha scenario, "Cocci", is located here.

Tuesday, November 18, 2014

Skin The Cats - A Chain of Command Tank Battle

"I guess we'll walk back to the front lines then..."
Last week was a fun one for gaming.  Not only did we get to try Dave V's cool Death Star trench run scenario for Star Wars, but I was able to test a new Chain of Command scenario with the help of conscript Byron M on Friday. The figures and terrain are all 15mm.

Patrol Phase complete - Byron made me some laser cut wood markers for Chain of Command, and I painted them up; I like the effect
I am a major league tread-head - tank battles are pretty much my favourite games.  Games like "Flames of War" certainly give you a chance to shoot up a whole bunch of tanks in a short game, and that can be fun - a lot of fun - but I am always on the lookout for a set of rules that could provide players with a more involved perspective of tanks and armour without bogging everyone down in needless (and boring) details.

Russian Patrol Marker

German Patrol Marker
With its unique activation mechanics, Chain of Command fits that bill. In the basic/original rules, however, tanks are add-ons to a force, so it could be hard to keep them moving/firing due to limitations on the dice pool - you can only roll so many dice, and activate so much different stuff, at one time. 
Russian Platoon moving out - the fellow with the yellow token has been hit!

T-34/85 deploys in ambush
Enter "Big Chain of Command".  Released earlier this year by the Too Fat Lardies, these slight alterations to their popular new Chain of Command rules  allow for multiple platoons on one or both sides of the game.  It also provides a bit of a quick overview and some extra clarity on how to employ an armoured platoon as an element in the game. This feature immediately drew my attention, and I have been plotting for scenarios ever since...

Fire! I like to use markers to try and show the dust etc. kicked up when these big main guns fire
Byron M agreed to help me test how a tank-vs-tank scenario would play out.  The scenario was simple, set in the late war, Eastern Front, 1944.  A platoon of Panthers, having held the line while others fell back, must now fall back themselves.  Making their way carefully back to the lines, they encounter a force of T-34/85s - battle ensues, each force out to break the other.  I used "Scenario 3 - Attack and Defend" as the basis.

Right on! Panther start to find the range
Byron took command of the Russian force - two platoons of three T-34/85s each.  I played the Germans, a nasty platoon of 4 Panthers.  For ease of play, everyone was rated regular.  Even though no infantry was present, we set up a patrol phase etc. as the jump-off points might prove useful for capture etc.  Byron also suggested a useful rule allowing vehicles in the defending force to attempt to deploy on-table via a jump-off point.  Basically they made a D6 roll to deploy, needing a 4+.  If they failed, they had to wait for another phase and enter along a table edge as normal for vehicles.

Byron's tankers move into the centre of the table
We got our platoons into action in fairly short order - Byron successfully deployed one tank on the table, with the rest rolling on the board.  My fellows entered along the opposite table edge.  A knife-fight with high-velocity tank guns was underway...

A Panther draws a bead from a covered position - this was a lucky cat...for most of the game...

Now THAT is an armour save! How can we lose?
Every luck streak runs out, however...
What I enjoy most about Chain of Command is how the activation system creates an ebb and flow to an engagement you cannot find with a conventional IGOUGO system.  Byron had some good luck initially, knocking the main gun out on a Panther, and generally moving into position.  But his luck on shooting was terrible - he missed something like seven straight shots by a single pip on the dice!

The action develops in the centre
Then momentum switched and went the German way for a few phases. The Panthers started to knock out the T-34s.  After a few phases Byron's six-tank force was down to just two runners. Sounds like an easy victory looming, right?  I had two tanks - the platoon commander included - in great position and they moved into the centre of the table to take the surviving T-34s in the flanks.  It would be no problem at all...

The Panther platoon commander engages targets from the flank - and they burn!

Nice! Flank armour cannot stop 75mm high-velocity shells.  The Panthers have this one in the bag, right?
Er, not so much.  Byron's gunners suddenly found the range, while my dice-luck deserted me.  In two quick final phases Byron's last two T-34s cooked two Panthers (!) and seriously damaged a third.  I went from three runners to one - and it had no main gun! Alas, the fate of many German rear-guards...these panzer crews would be finding their way back to the lines on foot, if they found their way at all...

Russians do not give up...

Hey!!! This Panther is immobilized and takes shock from a point-blank hit...uh-oh...
I quite enjoyed the Big Chain of Command system and really loved this game - it was a very involved and engaging tank battle without needing tons of tanks on both sides.  There are some nice extra details to tank command in Chain of Command, without having too many of them, and Big Chain of Command is a good way to get them on the table. By far this is the most fun I have had with a tactical tank engagement. I hope to tweak the scenario a little bit and try it again sometime soon with the main Fawcett Avenue crew...

There goes the Panther command tank...
Thanks to Byron for serving as guinea pig, and for bringing along some awesome terrain to help the table pop.  That is one key thing for these armoured engagements...you will want a lot of terrain if possible, otherwise it will be a gun duel at the edges.   On this table we managed to have a mix of fields and towns and things to slow things down that looked OK.

Up next - some painting stuff. And a new scale for me.  Because I'm dumb like that.

Monday, November 17, 2014

JimCon 4 - Death Star Trench Run

As previously reported, JimCon 4 was held this past weekend. Now a fixture of the Winnipeg gaming community, a few hundred people had a fun time playing all manner of board, tabletop, card, and miniatures games. Kudos to the con committee and volunteers for putting on another great event!

Saturday afternoon found Conscript Jim and myself running The Battle of Yavin - The Death Star Trench Run, using the very popular Star Wars: X-Wing Miniatures Game rules and miniatures, and using Dagobah Dave's Death Star Trench Run Mission, available here.

The Conscripts always run newbie-friendly games. Indeed, three of the players were playing their very first game of X-Wing Miniatures!

The players were divided into the following forces:

REBELS:
Gold Squadron (played by Alex)
(Gold Leader) Dutch Vander, R5 Astromech, Proton Torpedoes
Horton Salm, R2 Astromech, Proton Torpedoes
Gold Squadron Pilot, R5 Astromech, Proton Torpedoes

Red Squadron, "A" Flight (played by (Michael)
(Red Leader) Garven Dries, R5-K6, Proton Torpedoes
Rookie Pilot, Proton Torpedoes

Red Squadron, "B" Flight (played by Natasha)
Luke Skywalker, Elusiveness, R2-D2, Proton Torpedoes
Biggs Darklighter, R5 Astromech, Proton Torpedoes
Wedge Antilles, Wingman, R5 Astromech


IMPERIALS:
Black Squadron (played by Jason)
Darth Vader, Push the Limit, Engine Upgrade
Black Squadron Pilot, Draw Their Fire
Black Squadron Pilot, Wingman

Obsidian Squadron (played by Mark)
Howlrunner, Squad Leader
Obsidian Squadron Pilot

Training Squadron (played by Jeff)
Academy Pilot
Academy Pilot
Academy Pilot
Academy Pilot

The Imperials also ran the Death Star's Turbo Lasers: 5 turrets on the surface, and 6 emplacements in the Trench Zone. The Rebels could shoot at the Turbo Lasers, and at 3 Power Nodes, with varying game effects. Any Imperial generic pilot that was shot down just came back in their deployment zone during each turn's End Phase, representing reinforcements.

We made a few changes to the printed mission and rules:
  1. The playing surface area was 3 feet wide by 6 feet long. Both sides' Deployment Zones were reversed from the printed materials. The movie Star Wars clearly indicates that the Rebels came in from the east side of the trench.
  2. There was no points limit; each side got the listed forces (we had available some more ships if any more folks had shown up, including Porkins and 2 Red Squadron Pilots, and Chewbacca in the Millennium Falcon and Han acting as a gunner).
  3. Pilot cards, skills, upgrades, and maneuvers were consolidated onto printed sheets for the players, on which they recorded their Speed and Maneuver each turn. We've found that for convention games this greatly reduces tabletop clutter.
  4. The Trench Zone stacking limit was kept at 3 small ships per side. However, only those ships wanting to fire torpedoes at the Auxiliary Exhaust Port needed to enter in the Trench Zone Entry Area to the south: anyone else (on either side) could drop into the Trench Zone at any point to dogfight.
  5. To indicate performing a Drift maneuver in the Trench Zone, the player just marked their speed and maneuver on their sheet and added the word "Drift".
  6. Generic Imperial pilots that were shot down were redeployed during the End Phase.
  7. During the End Phase the Countdown Clock was advanced by 1 if during the turn at least 1 Imperial ship was destroyed. Then, the clock's number was subtracted by one as usual.

Each side were assigned forces, and then the players secretly conferred about whose ships would be entering the Trench. 

Below, looking south, the Rebel players moved their ships toward the Trench, under the watchful eye of Jim, who really helped the game move along at a good pace.

Camera Roll-1143


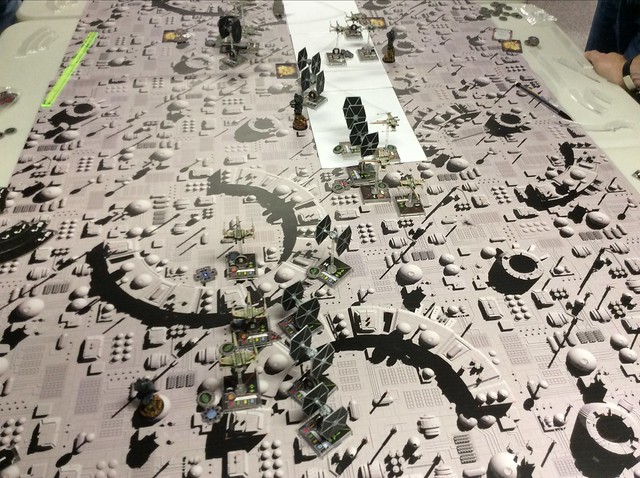
The Imperials then showed up next turn, screaming onto the table at maximum speed.
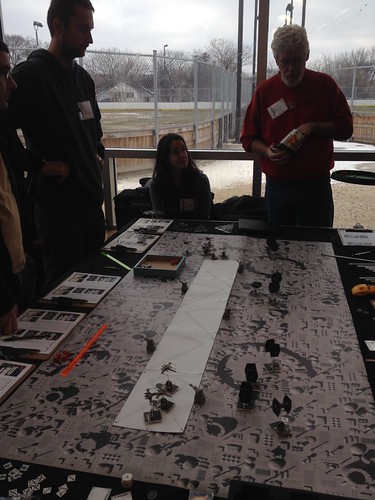
Camera Roll-1144


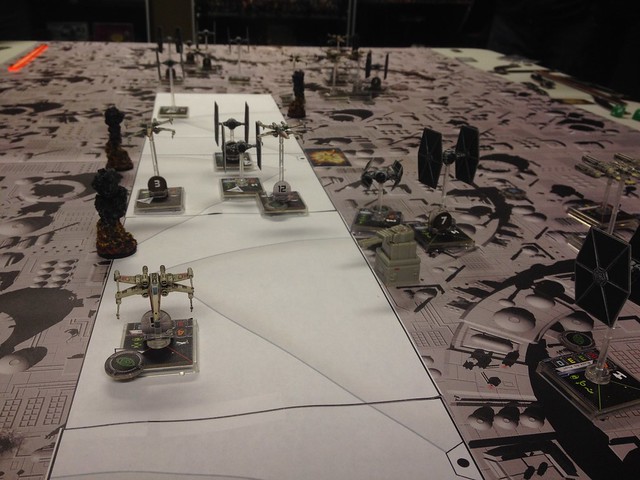
Below, looking north, Red Leader and his two wingmen went after a Power Node, also drawing fire away from Gold Squadron's Y-Wings.
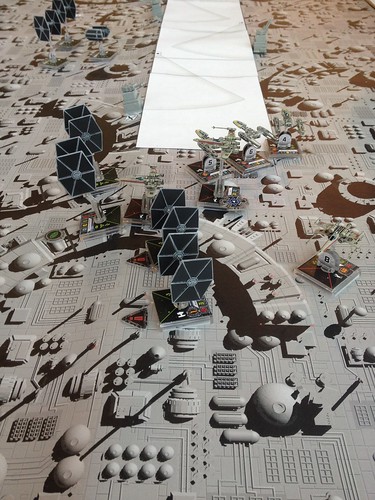
Camera Roll-1145


Camera Roll-1146


Gold Squadron dropped into the Trench Zone. (I can be seen at the far end of the table, wearing my  "Red Five" tee shirt from TeeFury.com.)
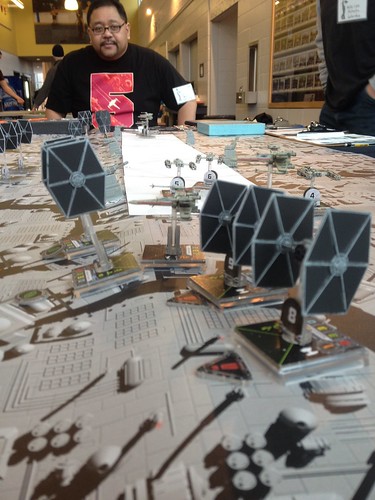
Camera Roll-1147


Meanwhile, at the northern end of the table, Luke and Wedge were shooting up Turrets and Power Nodes. Biggs, bravely drawing fire away from his childhood buddy, paid the ultimate price as he was gunned down by 4 TIE Fighters.
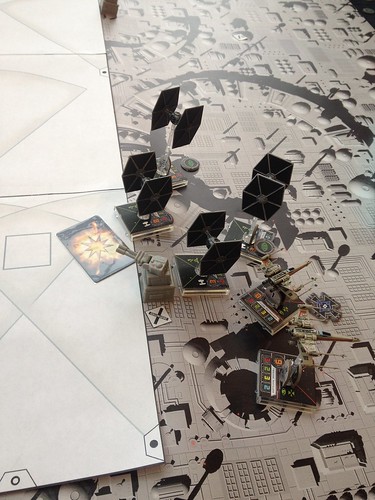
Camera Roll-1149


After nailing a Power Node, Red Leader was shot down by a pair of TIEs on the right of the photo, while his wingmen shot down another Imperial.
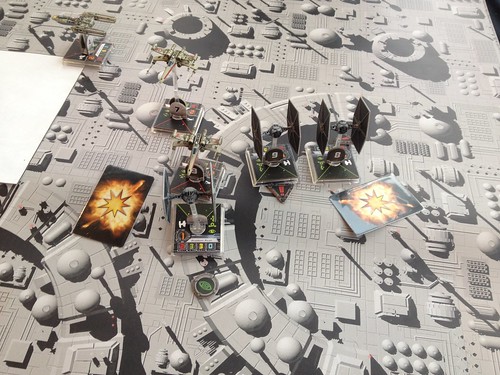
Camera Roll-1150


Gold Squadron commenced their attack run, set upon by a pair of TIE Fighters.
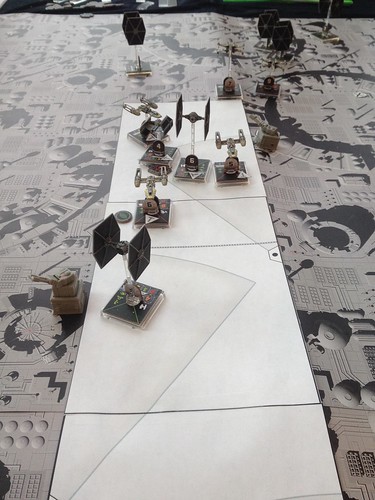
Camera Roll-1151


Gold Leader was the first of Gold Squadron to fall. In the backgorund, Darth Vader flies south.
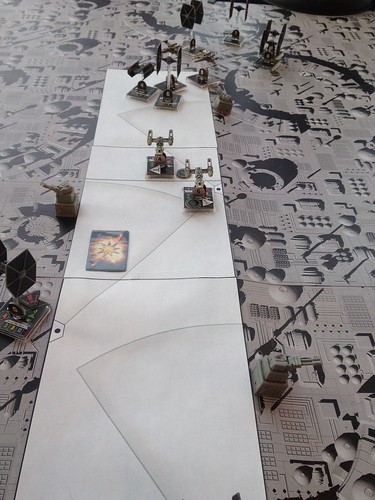
Camera Roll-1152


The slow Y-Wings made their way up the Trench, beset by TIEs and Trench Turbo Lasers. The Imperials decided to keep the Trench Zone guns firing, despite the danger to their own ships. They considered the risk worthwhile.
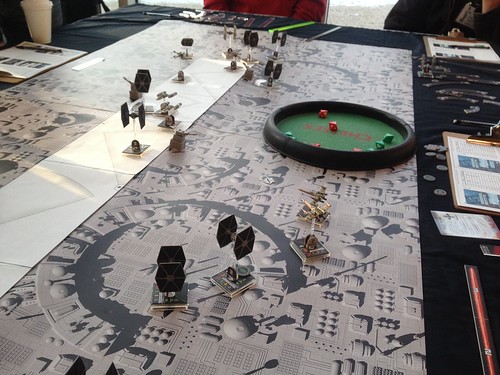
Camera Roll-1153


Utter carnage as Horton, an X-Wing, and a couple of TIE Fighters go down. The last of the Rookie Pilots also dropped his X-Wing into the Trench Zone.
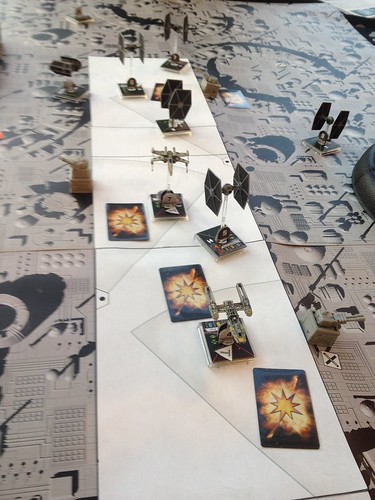
Camera Roll-1154


Wedge got nailed by a TIE Fighter, then Luke dropped into the Trench; he was too close to fire at the Exhaust Port, but he could lay fire into those pasky TIE Fighters! The Imperials played things cagey, pulling fighters out of the Trench and dropping others in.
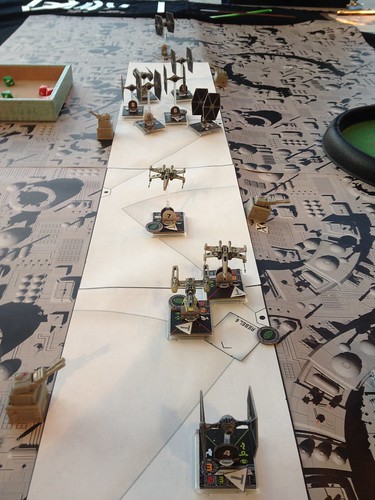
Camera Roll-1155


The Rebels were now reduced to only three ships, all of which were in the Trench. The two X-Wings cleared a path for Gold Squadron's sole survivor, shooting down both Howlrunner and one of her escorting TIE Fighters.
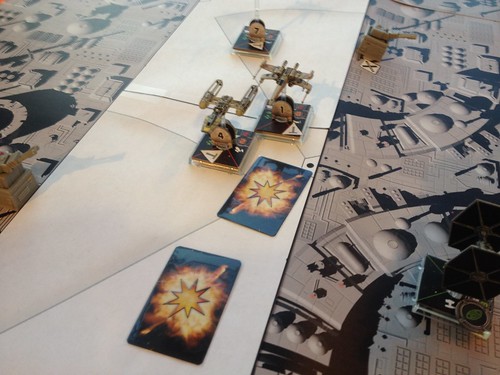
Camera Roll-1156

With 3 turns left, and only two ships able to fire at the Port, the Gold Squadron Pilot fired his torpedos. He was only able to take down a single shield!

"Negative, Negative. It just impacted on the surface."
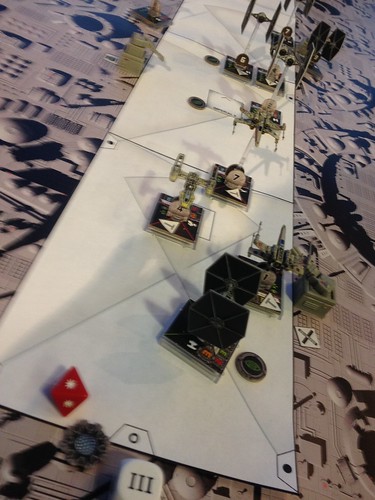
Camera Roll-1157


Luke pulled a U-turn to joust with Darth Vader, who was Stressed to the max.

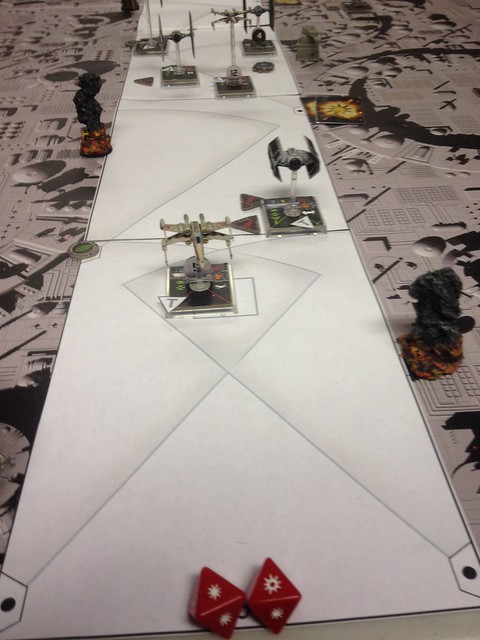
Only two turns left in the game, and only the Rookie Pilot was able to get a targeting solution. Though inundated with shots from 3 Imperials the Force was strong with the Rookie, who evaded every blaster bolt!

With the fate of the Rebellion riding on a single throw of the dice, the Rookie fired...

"It's away!"
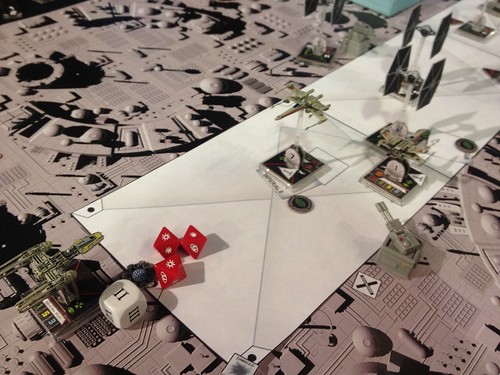
Camera Roll-1158


Two Critical Hits blasted through the ray shielding, causing an explosive chain reaction that destroyed the Death Star! I always love games that are decided with the final dice throw.

The following photo is of all the Trench Run participants; from L-R: Mark, Jason, Alex,  Natasha, Jeff, and Michael.

Camera Roll-1160

The Rebel players (Natasha, Alex, and Michael) won the game, and some single blister packs of X-Wing Miniatures that I provided as prizes.

The players seemed to have a fun time. Also, during the game several passersby walked up to the table to watch, immediately recognizing the scenario.

***

During JimCon I was also introduced to a new WWI air combat game, Dawn of Aces.
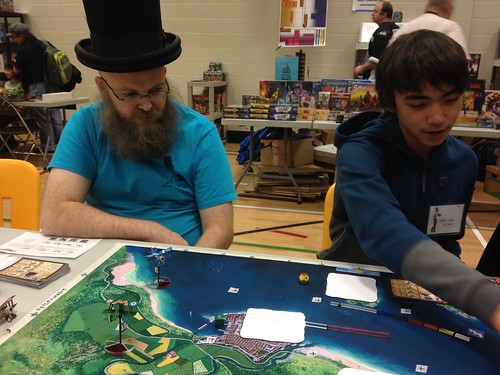
Camera Roll-1161


Pilots are based on historical fliers. Each plane has its own control panel, to keep track of damage, ammo expenditure, and fuel use. Players choose from an available pool of manuvers, with speed depending on a coloured rating for each aircraft/engine/ manueverability combo. Players move in random order each turn, with special events also randomly occuring. It is definitely better to move last.

Below are some of the components for the game. The demo planes are all very nice paper models made by the game's designer, Sam.
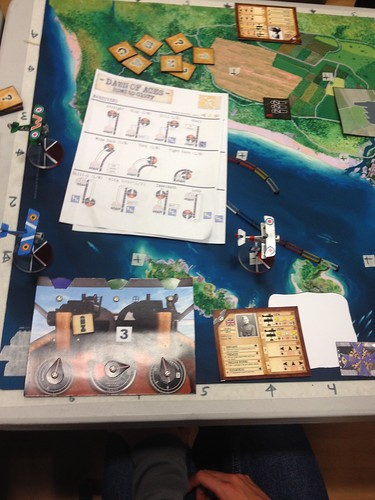
Camera Roll-1162

Wil ran me through a quick intro game, where my single Albatross DIII went down after a bloody engagement against a pair of Allied fighters. Meanwhile, Sam was at the next table, running a big game.

I look forward to playing this game again!

Friday, November 14, 2014

Death Star Trench Run - Playtest

JimCon 4 starts this weekend. Long in planning, the Conscripts will be hosting The Battle of Yavin Part II - The Attack on the Death Star. (I wrote about Part I here.)

A big spanner in the works was the utter failure of my priming of the resin surface panels of the Death Star. Long story short, I shall be stripping and re-priming 20 1-foot-square resin panels at some undetermined future date.

Undeterred, there is still Plan B, utilizing the GF9 mats and turrets we used in The Battle of Yavin Part I.

Recently we playtested Dagobah Dave's Death Star Trench Run Mission, with 8 Conscript players and two dozen model ships!

Here's a taste of the action:


"We'll have to destroy them ship to ship. Get the crews to their fighters."

Camera Roll-1137


"Several fighters have broken off from the main group. Come with me!"

Camera Roll-1140


"We're in position. I'm gonna cut across the axis and try and draw their fire!"

Camera Roll-1141


"The guns - they've stopped!"

Camera Roll-1138


"It's away!"

Camera Roll-1139


Tomorrow we shall run the scenario during Slot 6 at JimCon, at 1:30 PM. Should be a lot of fun!

Thursday, November 6, 2014

Early '80's Soviets

1:100 A-10 from Revell

Soviet Inf from Peter Pig


T-72's from QRF in one of Byron's excellent storage boxes

T-64's from QRF w/ ERA

ZSU 23-4 with scratch built gun because QRF didn't send one. This a blessing in disguise when one considers the quality of QRF gun barrels.

BMP 2's from QRF w/ replacement barrel's

Mi-24 Hind D from QRF. Metal bits are very soft. I think the molds are old as the resin was badly pitted. It is however, the only 1:100 scale Hind out there. There are a few details I had to add using green stuff that aren't sculpted onto the model.